

How to Create a Database of a Machine

How to Create a Machine Database in DigiVibMX9
Creating a Machine Database in DigiVibMX9 is an essential step for effective vibration monitoring and condition-based maintenance. A properly organized machine database helps engineers track equipment health, collect vibration data, and perform accurate analysis for pumps, motors, compressors, gearboxes, blowers, and cooling fans.
By setting up a structured database, maintenance teams can easily monitor machine performance and detect faults early using vibration analysis tools.
1. Start a New Project or Open an Existing One
To begin creating a Machine Database in DigiVibMX9, start by creating a new project within the software. Projects act as containers where all machine information and vibration measurement data are stored.
If you already have data from previously monitored equipment, you can open an existing project and add the new machine details to the same database.
2. Define Machine Parameters
After creating the project, the next step in building a Machine Database in DigiVibMX9 is defining the machine information. Accurate machine details help in proper identification and analysis.

Typical machine parameters include:
- Machine Name – A unique identifier for each machine
- Machine Type – Pump, Motor, Compressor, Gearbox, Blower, Cooling Fan
- Manufacturer – Company that produced the machine
- Model Number – Equipment model identification
- Serial Number – Unique manufacturing number
Providing complete machine information ensures better traceability and analysis during condition monitoring activities.
3. Setup Measurement Points
Measurement points are locations where vibration data is collected using sensors. Defining proper measurement points is critical when creating a Machine Database in DigiVibMX9.
Each measurement point typically includes:

- Measurement Point ID – Unique identifier for each location
- Measurement Point Description – Example: Drive End Bearing, Non-Drive End Bearing, Gearbox Housing
- Sensor Type – Accelerometer or vibration sensor
- Sensor Location – Horizontal, Vertical, or Axial direction
Correct placement of measurement points improves the accuracy of vibration diagnostics.
4. Configure Data Acquisition
Once machines and measurement points are defined, DigiVibMX9 can collect vibration data from the sensors.
Key data acquisition settings include:
- Sampling Rate – Determines how frequently vibration signals are captured
- Number of Channels – Number of sensors connected to the device
- Measurement Duration – Time period for collecting vibration data
Proper data acquisition settings ensure reliable vibration measurements for condition monitoring.
5. Data Storage and Analysis
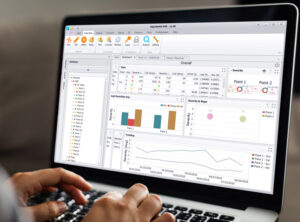
All collected vibration signals are stored within the project database. DigiVibMX9 provides multiple analysis tools to interpret machine health conditions.
Common analysis methods include:
- Frequency Spectrum Analysis – Identifies dominant vibration frequencies and potential faults
- Time Waveform Analysis – Shows vibration behavior over time
- Alarm Level Comparison – Detects abnormal vibration levels compared to reference limits
These analysis tools help maintenance engineers detect faults such as imbalance, misalignment, and bearing defects before serious failures occur.
Additional Tips for Creating a Machine Database in DigiVibMX9
- Always follow a consistent naming convention for machines and measurement points.
- Refer to the DigiVibMX9 user manual for recommended configuration settings.
- Follow manufacturer recommendations for sensor placement and data collection parameters.
- Regularly back up project files to prevent data loss.
A well-structured Machine Database in DigiVibMX9 allows maintenance teams to perform effective vibration analysis, improve equipment reliability, and support predictive maintenance programs.
